manual camera settings cheat sheet pdf
Manual Camera Settings Cheat Sheet PDF: A Comprehensive Guide
Embark on a journey into the world of manual photography with our comprehensive guide! This resource is designed to demystify camera settings, providing a printable cheat sheet. Unlock your creative potential, master the exposure triangle, and capture stunning images with confidence using our manual settings cheat sheet.
Understanding Manual Mode
Manual mode empowers photographers with complete control over their camera’s settings, enabling precise adjustments to aperture, shutter speed, and ISO. Unlike automatic modes, manual mode allows for creative expression and tailored image capture in diverse shooting conditions. Grasping manual mode unlocks the full potential of your camera, giving you the ability to craft images that reflect your artistic vision.
By understanding the interplay of these settings, you can achieve desired effects such as shallow depth of field, motion blur, and optimal exposure. Manual mode is essential for challenging lighting situations, such as low-light environments or high-contrast scenes, where automatic modes may struggle. Embrace the learning curve, experiment with different settings, and discover the freedom and creative possibilities that manual mode offers, ultimately elevating your photography skills and producing truly unique and captivating images. This mode is essential.
The Exposure Triangle: Aperture, Shutter Speed, and ISO
The exposure triangle comprises aperture, shutter speed, and ISO, the three fundamental elements that determine an image’s brightness and overall exposure. Aperture controls the lens opening, influencing depth of field and the amount of light entering the camera. Shutter speed dictates the duration the camera’s sensor is exposed to light, affecting motion blur and image sharpness. ISO measures the sensor’s sensitivity to light, impacting image noise and overall brightness.
Mastering the exposure triangle involves understanding the interplay between these three settings. Adjusting one setting necessitates compensating with the others to maintain proper exposure. For instance, increasing the aperture requires either decreasing the shutter speed or lowering the ISO. By skillfully manipulating these settings, photographers can achieve desired creative effects, capture well-exposed images in various lighting conditions, and unlock the full potential of manual photography. Experimentation and practice are key to mastering this fundamental concept.
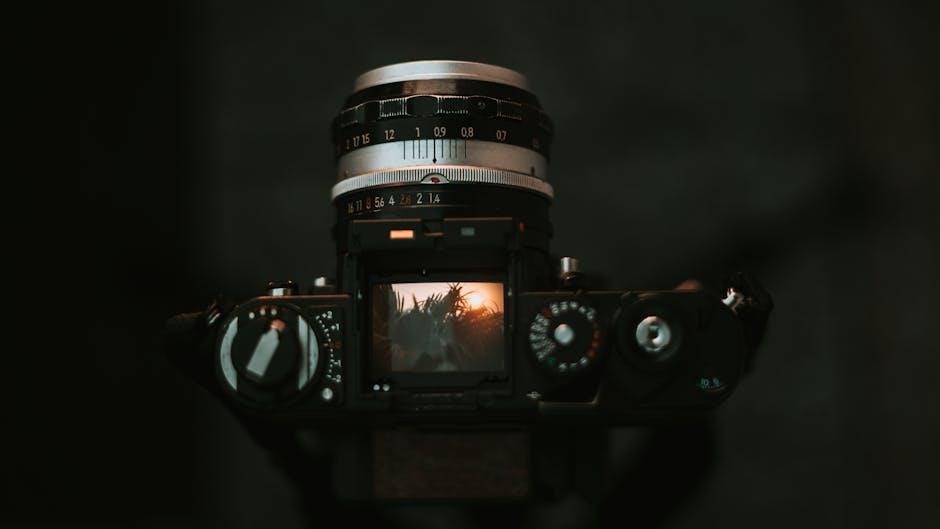
Aperture Explained
Aperture, represented by f-numbers (e.g., f/1.4, f/2.8, f/8), controls the size of the lens opening, thereby influencing the amount of light reaching the camera sensor. A wider aperture (smaller f-number) allows more light, resulting in brighter images and shallower depth of field, ideal for portraits with blurred backgrounds. Conversely, a narrower aperture (larger f-number) lets in less light, creating darker images and greater depth of field, suitable for landscapes where everything is in focus.
The aperture setting affects not only exposure but also the aesthetic qualities of an image. A shallow depth of field isolates the subject, drawing attention to it, while a deep depth of field ensures sharpness throughout the scene. Selecting the appropriate aperture depends on the desired creative effect and the specific shooting conditions. Understanding the relationship between aperture, light, and depth of field is crucial for mastering manual photography and achieving desired results.
Shutter Speed Explained
Shutter speed, measured in seconds or fractions of a second (e.g., 1/2000s, 1/60s, 1s), determines the duration the camera’s sensor is exposed to light. A faster shutter speed allows less light to enter, freezing motion and preventing blur, ideal for capturing fast-moving subjects like sports or wildlife. Conversely, a slower shutter speed allows more light in, blurring motion and creating a sense of movement, often used for capturing light trails or silky water effects.
The choice of shutter speed depends on the subject’s speed and the desired effect. To freeze a fast-moving object, a high shutter speed is necessary, while a slow shutter speed can be used to create motion blur. Additionally, longer shutter speeds require a stable surface or tripod to avoid camera shake. Mastering shutter speed allows photographers to control the perception of motion and capture dynamic images. The interplay between shutter speed, aperture, and ISO forms the exposure triangle, enabling precise control over image brightness and creative expression;
ISO Explained
ISO represents the camera sensor’s sensitivity to light. A lower ISO (e.g;, ISO 100) indicates less sensitivity, producing cleaner images with minimal noise, ideal for well-lit environments. A higher ISO (e.g., ISO 3200 or higher) boosts sensitivity, allowing for shooting in low-light conditions, but it introduces more noise or grain into the image.
Selecting the appropriate ISO depends on the available light; In bright daylight, a low ISO is preferable for optimal image quality. As light diminishes, increasing the ISO becomes necessary to maintain a proper exposure. However, it’s crucial to balance ISO with aperture and shutter speed to avoid excessive noise.
Modern cameras offer improved high-ISO performance, but it’s still essential to minimize ISO whenever possible. Understanding ISO is crucial for achieving well-exposed images in various lighting situations. Experimenting with different ISO settings will help you determine the optimal balance between brightness and image quality.
White Balance and Color Temperature
White balance (WB) corrects color casts, ensuring accurate color rendition in your photographs. Color temperature, measured in Kelvin (K), describes the warmth or coolness of a light source. Different light sources emit different color temperatures; for example, incandescent light is warm (around 2700K), while daylight is cooler (around 5500K).
Your camera’s auto white balance (AWB) mode attempts to automatically correct color casts, but it’s not always accurate. Manual white balance settings allow you to fine-tune color temperature for specific lighting conditions. Common presets include daylight, cloudy, shade, tungsten, and fluorescent.
To achieve accurate colors, match your white balance setting to the prevailing light source. Alternatively, you can use a gray card to set a custom white balance. Understanding white balance and color temperature is crucial for capturing true-to-life colors in your images. Experimenting with different white balance settings will help you develop a keen eye for color.
Metering Modes in Manual Photography
Metering modes are essential tools in manual photography, guiding your camera’s exposure calculations. They determine how your camera assesses the brightness of a scene to suggest appropriate aperture, shutter speed, and ISO settings. Understanding these modes is crucial for achieving well-exposed images.
Evaluative metering (also known as matrix or multi-segment metering) analyzes the entire scene, considering multiple points to determine the overall exposure. It’s ideal for general photography and scenes with even lighting. Center-weighted metering focuses on the center of the frame, giving it more importance in the exposure calculation. It’s suitable for portraits and subjects in the center of the frame.
Spot metering measures the light from a very small area, typically the center point. It’s useful for high-contrast scenes where you want to expose for a specific element. Highlight-weighted metering prioritizes preserving highlight detail, preventing overexposure in bright areas. Experiment with these modes to master exposure control and achieve your desired look.
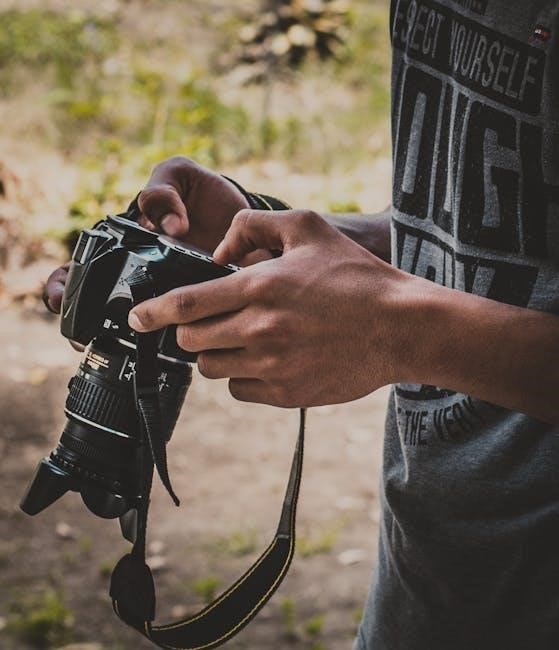
Focusing Techniques in Manual Mode
Mastering manual focus opens up a world of creative control and precision in your photography. Unlike autofocus, manual focus requires you to adjust the lens until your subject appears sharp in the viewfinder or on the LCD screen. This technique is particularly useful in challenging situations where autofocus systems struggle, such as low light or when shooting through obstructions.
One effective method is to use focus peaking, a feature available on many mirrorless and advanced cameras. Focus peaking highlights the areas in your image that are in sharp focus, making it easier to fine-tune your focus manually. Another technique involves zooming in on your subject to magnify the image, allowing you to see the details more clearly and achieve precise focus.
Practice these techniques to develop your manual focusing skills. With patience and practice, you’ll be able to confidently capture sharp, well-focused images in any situation.
Composition Tips for Manual Photography
Composition is the art of arranging elements within your frame to create visually appealing and impactful photographs. When shooting in manual mode, understanding composition becomes even more crucial as it allows you to fully control the storytelling aspect of your images. The rule of thirds is a fundamental guideline, suggesting you divide your frame into nine equal parts and place key elements along these lines or at their intersections.
Leading lines can draw the viewer’s eye through the image, creating depth and guiding their attention to the subject. Experiment with different perspectives, shooting from high or low angles to add dynamism to your compositions. Pay attention to the background, ensuring it complements rather than distracts from your subject;
Utilize negative space to create a sense of balance and highlight your subject. Consider symmetry and patterns to create visually striking images. By consciously applying these composition techniques, you can elevate your manual photography and create images that captivate and engage your audience.
Free Photography Cheat Sheets and Resources
Unlock a treasure trove of knowledge with our curated collection of free photography cheat sheets and resources! These invaluable tools are designed to assist photographers of all levels, from beginners venturing into manual mode to seasoned professionals seeking a quick reference. Our cheat sheets cover a wide range of topics, including the exposure triangle, white balance, focusing techniques, and composition guidelines.
Downloadable in PDF format, these resources are easily accessible on your phone or tablet, making them the perfect companion for on-location shoots. Explore our collection of online articles, tutorials, and videos to deepen your understanding of photography concepts.
Discover websites offering free stock photos, editing software, and online communities where you can connect with fellow photographers. Take advantage of these resources to enhance your skills, expand your knowledge, and elevate your photography journey. Start exploring today and unlock your creative potential!
Troubleshooting Common Manual Mode Issues
Encountering difficulties in manual mode? Fear not! This section addresses common challenges faced by photographers and provides practical solutions. Is your image too dark or too bright? We’ll guide you through adjusting aperture, shutter speed, and ISO to achieve proper exposure; Are your photos blurry? Learn how to troubleshoot focus issues and ensure sharp, clear images.
Experiencing color casts? Master white balance settings to accurately render colors. Dealing with noisy images? Discover techniques to minimize noise while maintaining image quality. We’ll also cover common metering problems and offer tips for accurate exposure readings.
Don’t let frustration hinder your creative journey. With our troubleshooting guide, you’ll be equipped to overcome obstacles and capture stunning images in manual mode. From understanding camera settings to mastering focusing techniques, we’ll help you navigate the complexities of manual photography and unlock your full potential. Start troubleshooting today and elevate your skills!
Advanced Manual Photography Techniques
Ready to take your manual photography skills to the next level? This section delves into advanced techniques for creative expression. Explore the power of intentional camera movement to create artistic blur effects. Master long exposure photography to capture stunning light trails and smooth water.
Learn how to use graduated neutral density filters to balance exposure in high-contrast scenes. Discover the art of focus stacking to achieve maximum sharpness throughout your image. Experiment with advanced metering modes to fine-tune your exposure settings.
Unleash your creativity with multiple exposures, blending different images into a single, captivating frame. Explore advanced white balance techniques for unique color effects. Dive deeper into understanding the relationship between aperture, shutter speed, and ISO to achieve specific artistic visions.
With these advanced techniques, you’ll be equipped to push the boundaries of manual photography and create truly exceptional images. From capturing breathtaking landscapes to crafting stunning portraits, the possibilities are endless. Embrace the challenge, experiment with new techniques, and elevate your photography to new heights!